I am a new member which is setup API for almond now
I have several questions when I am using the API When I am in the first step for the Authorization
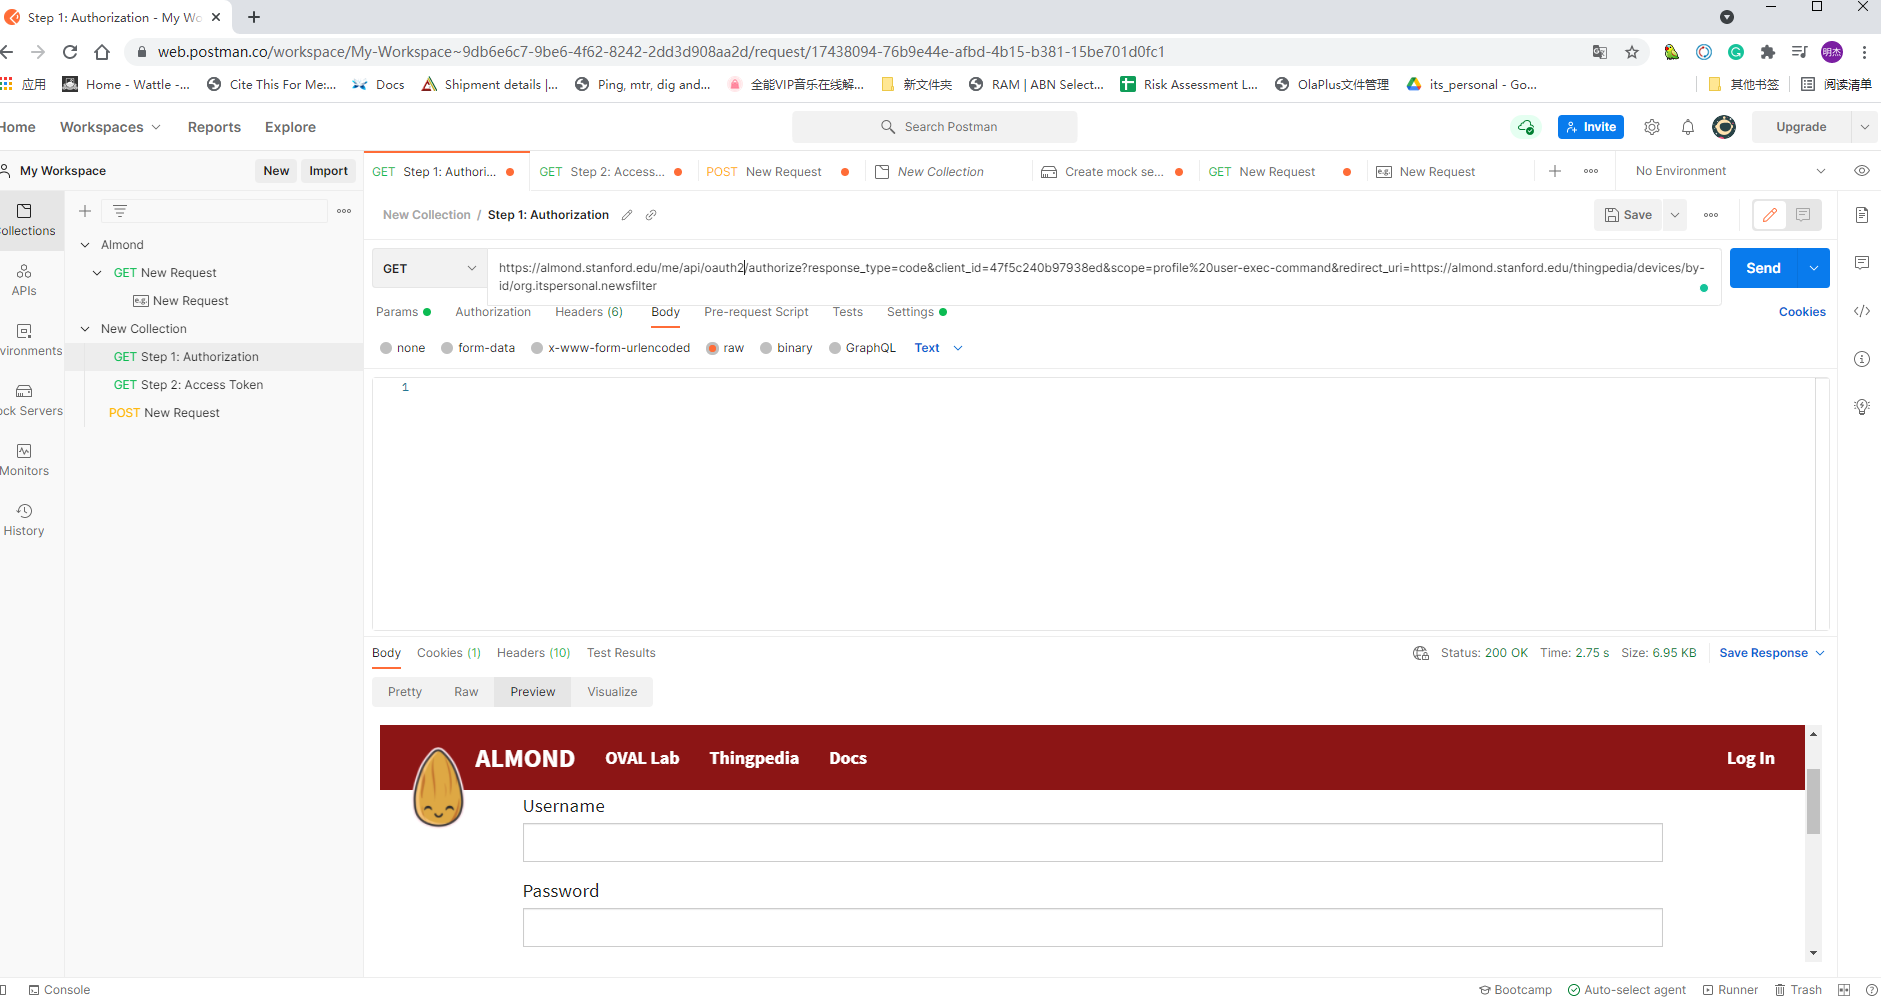
it ask for login but it is not likely as it saying, moreover, the command cannot the picture, how to using command for this steps the code I am using is
https://almond.stanford.edu/me/api/oauth2/authorize?response_type=code&client_id=47f5c240b97938ed&scope=profile%20user-exec-command&redirect_uri=https://almond.stanford.edu/thingpedia/devices/by-id/org.itspersonal.newsfilter
Meanwhile after login
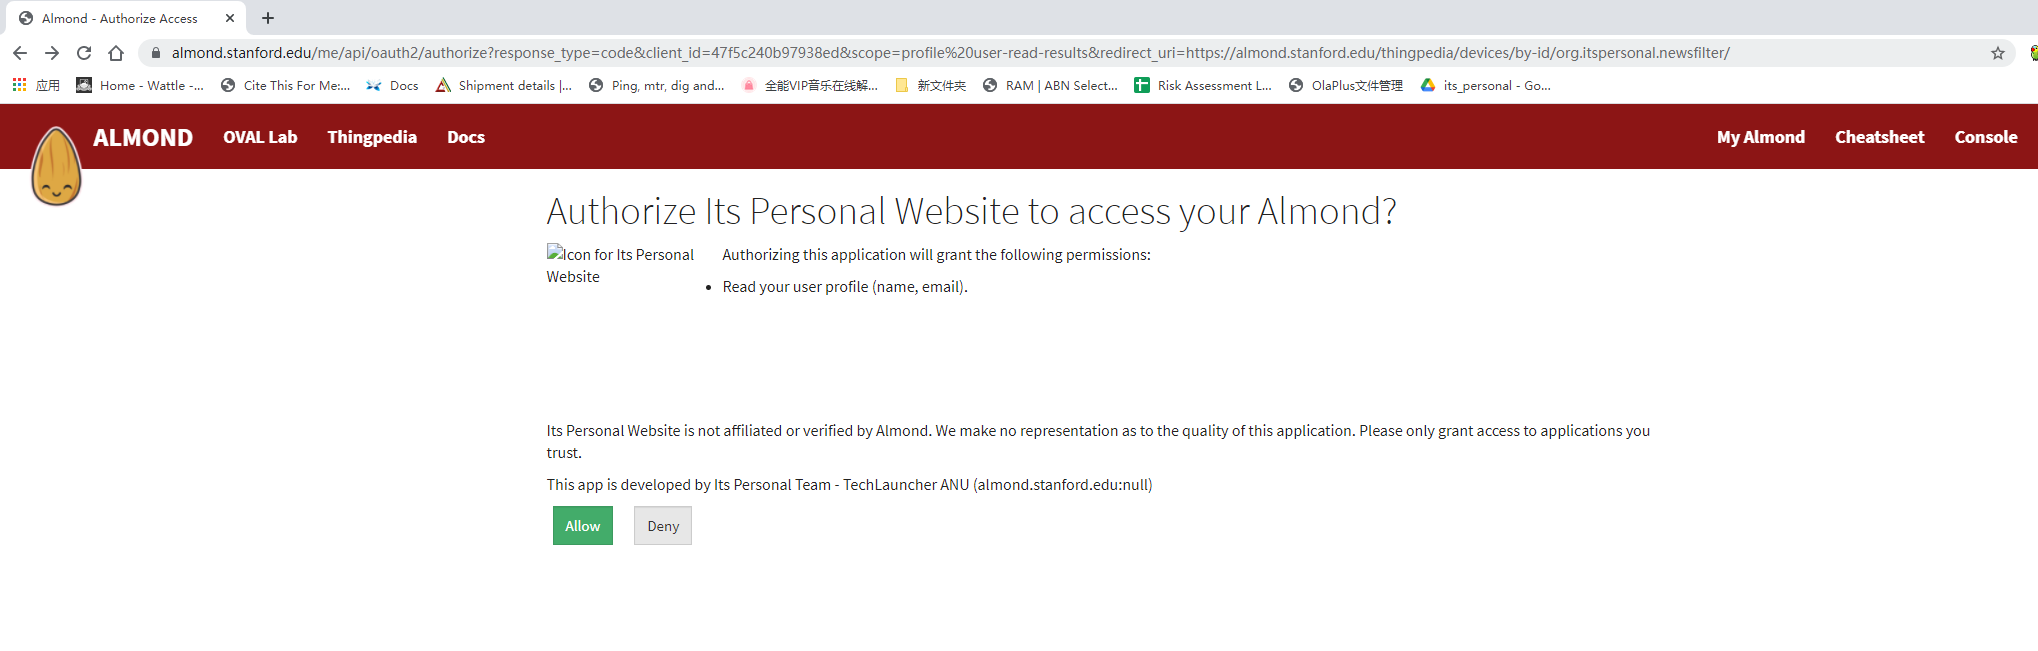
I get into these pages and click the allow, but how to do this by code
and after I click the allow
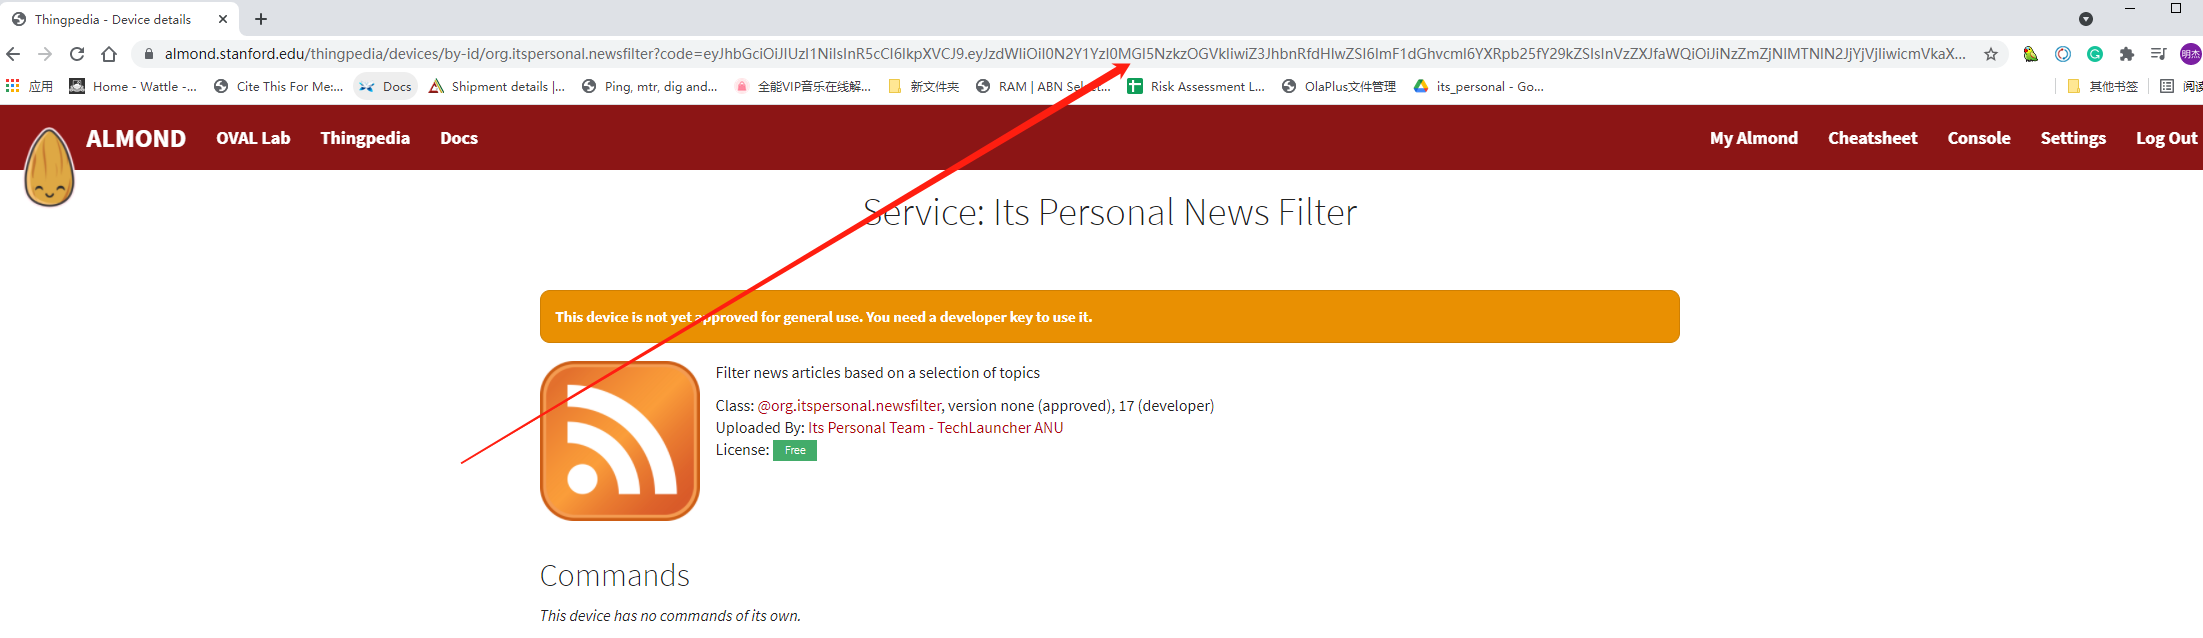
is the code mean to the Step 2: Access Token Parameters: code
and on this page it shows that This device is not yet approved for general use. You need a developer key to use it. how to apply the developer key in api
Hi!
I’m afraid there is a little confusion here, which means I’m not sure how to answer your questions.
The API you looked at is the Web Almond API. It is used to make a client for Almond - basically a full assistant, which can be a voice interface or some sort of chat UI. The API is not related to any individual skill, and is not related to OAuth support in skills (to authenticate Almond to third party services).
As for how the API is used, we use the standard OAuth protocol. If you’re not familiar, I suggest you look at existing tutorials on the web for OAuth, or if you’d like, the actual standard text in RFC 6749. The standard is dense but understandable.
Generally speaking though, at a high-level to use OAuth you need your own website, and when you register the OAuth app in the developer console you put the address of your own website. After a successful authentication, the user’s browser is redirected to a page in your website with the code in the query. You can then access the code and exchange it for an access token.
Hope this helps!
Hi Giovanni,
Mingjie is from the same project team as I am for this semester. We’re looking at the Web Almond API documentation for the purpose of connecting it with our own website, specifically so we can host an Assistant using a chat box like how its done in almond.stanford.edu, but with our own news filter device with the training (and NLP model) we did as we described in the other forum post.
Our main problem is that we don’t really understand the documentation that is given, so I think its best to start at the beginning or step 1.
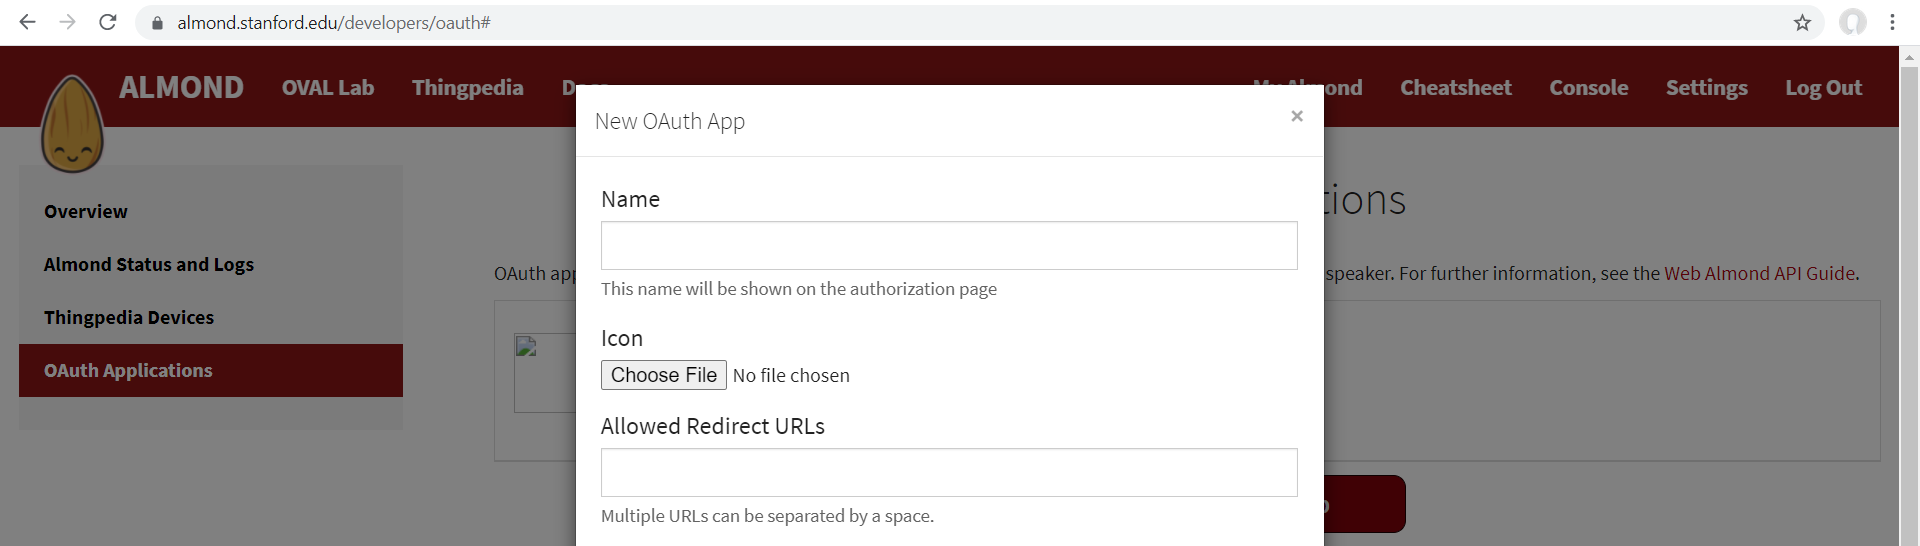
- In step 1, we are required to have a client ID and secret to access the
authorizeAPI. Is the client ID mentioned in this step obtained from the following page inalmond.stanford.edu?
- If so, how should we fill the contents of the form? Would the redirect go to something the example given,
http://yourapp.com/almond_authwhereyourapp.comis the url of our website? - Also, we’re not really experienced in implementing API itself, but from my understanding of the documentation, we need to pass the parameters and values to a certain address using either GET or POST. Is this understanding correct?
Alright, then the Web Almond API is the right place to go.
To your questions:
- Yes that’s where you register your OAuth app to get client ID and client secret.
- Yes you put your website as alloed redirect URL.
- And yes you make HTTP requests that include a certain Authorization header to the endpoints listed in the documentation, which are paths under almond.stanford.edu. If the method is POST, you specify the parameters to the API as request body, with application/set as the content-type. If the method is GET, you specify the parameters in the query part (
?part of the URL). Either way you receive the reply back as JSON.
Hi Giovanni,
I’ve been trying to use the websocket to do the first part of the documentation which is to authenticate, but I can’t seem to find a guide that explains how to actually send the GET, POST, and AUTHORIZATION request. The WebSocket command seems to have the following format:
new WebSocket("wss://almond.stanford.edu/me/api/oauth2/authorize?" + $parameters_and_variables)
However, it doesn’t seem to send back any messages back to the client as my onmessage function never seems to run and it instead only ever runs the onopen function. Are we not supposed to use WebSocket here and instead use HTTP requests from libraries such as axios? Did I misunderstand the usage of websocket for the api?
Also, searching online it says that we cannot set an Authorization header in WebSocket, but we are required in the documentation for the other endpoints. Is it supposed to be replaced using the accesstoken parameter in a GET request?
Edit:
I tried using axios to send the GET request for the first step of the authorization, but got the following error message:
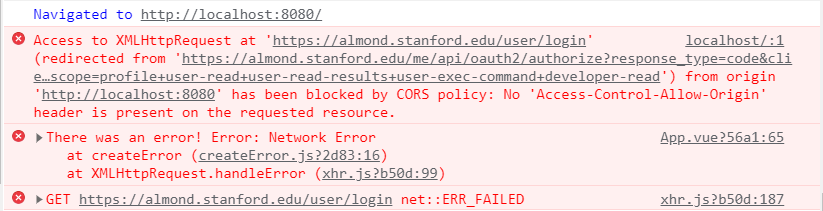
My new GET request code is as follows:
export default {
  name: 'App',
  created() {
    axios.get('https://almond.stanford.edu/me/api/oauth2/authorize', {
      params: {
        response_type: "code",
        client_id: $clientid,
        redirect_uri: "https://its-personal-web.herokuapp.com/almond_auth",
        scope: "profile user-read user-read-results user-exec-command developer-read"
      }
    }).then(response =>
      console.log(response)
    ).catch(error => {
      this.errorMessage = error.message;
      console.error("There was an error!", error);
    })
  }
}
Ok so, there are five steps to do the authentication in OAuth:
- The first is the authorize step. This is a navigation step: you need to point the user’s browser to https://almond.stanford.edu/me/api/oauth2/authorize with all the right query parameters. You can do this with a link (plain old
<a>tag) from your site, or with a redirect of some sort (HTTPLocation,location.href =, etc.) - The second is the redirect step. The user browser will navigate to your page with a bunch of query parameters, including the authorization code.
- Then is the token step. Using the parameters you got in the previous step, you make a POST HTTP call to https://almond.stanford.edu/me/api/oauth2/token and you receive the access token and refresh tokens. This is typically done server side because you need to include the client_secret, but for demo purposes you can do it client-side as well. At this step, you can use axios or any other HTTP library.
- Finally, is the usage step. You have the access token, you can make authenticated requests. For normal GET or POST, you’d put the token in the
Authorizationheader, prefixed withBearer. For WebSocket requests from the browser, you can set theaccess_tokenquery parameter (note the underscore). - Later, once you get a 401 from a request you’ll need to get a new access token. You do so with a POST to https://almond.stanford.edu/me/api/oauth2/token passing the refresh token you received at step 3.
Is it possible to have our own login page? As in we serve our own design for the login page and maybe do something like send the input for the username and password to the Almond server? or does this goes against the entire purpose of having OAuth.
Also, since we’ll use our own genie server, will there be any changes to the URL we call or some additional parameters we must use?
You cannot use your own login page with OAuth, no. It would not be secure to let arbitrary pages to login to Almond.
On the other hand, you had a custom deployment of almond-cloud that was completely independent of almond.stanford.edu at some point.
You should probably use that instead of almond.stanford.edu.
You can change the login page of that one (it’s at views/login.pug), and you can set the NLP URL in the config (NLP_SERVER_URL) to point to genie server.
So we would have to deploy our own almond-cloud if we want to use the custom genie server? Is it not possible to use the existing one by maybe pushing our model to the current thingpedia?
If we’re forced to redeploy our own almond-cloud again, can you explain how we can adjust the UI there? I believe the files are in some strange format called .pug.
Yes they are in Pug format. I’m sure you can find resources online about the format.
And no, sorry at the moment almond-cloud does not support having different NLP servers for different users, so this would not be possible. We might lift this restriction in the future but it’s not possible at the moment.
(If you feel adventurous, you can propose a PR to change that in almond-cloud, and then we might be able to merge that quickly to dev.almond.stanford.edu)
Can you explain in detail which pug file in the view corresponds to which page? I think we are only interested in having the following pages:
- Home page, with the assistant being usable there
- Assistant page if its not possible to combine it in the homepage
- Login page
- Sign up page
- A new page called About that contains information on the project
So maybe we can delete the ones that aren’t related to these pages. Also I’m trying to understand the pug file but it seems to be a way of writing html right? If so, where are the css, js, and assets (jpg and png for background/logo) located?
- Home page is views/about_index.pug and it includes the assistant when anonymous mode is enabled
- Assistant page is views/my_stuff.pug
- Login page is views/login.pug
- Sign up is views/register.pug
- You can add new about pages by editing the config variables EXTRA_ABOUT_PAGES and EXTRA_NAVBAR. See stanford/config.js for how our website is set up.
Yes pug is a way to write the HTML. CSS, JS, images are in public/. JS is also built using browserify from browser/
I wouldn’t recommend deleting existing pages, it might break. Rather, remove them from the navbar at views/navbar.pug if you don’t want people to see them.
I cant seem to find where stanford/config.js is located? Also, we’ll start posting our issues with the redeployment of the almond-cloud here since we disabled it at the start of the semester.
Root of the repository: https://github.com/stanford-oval/almond-cloud/blob/master/stanford/config.js
Did the format change from the one we used in the previous months? Our previous config looks like this. The config documentation link also doesn’t work in the installation documentation.
The config format did not change, the existing config should work.
But the new config has less variables and gave values to those that didn’t have any in the existing config
Example:
// gettext marker
function _(x) { return x; }

module.exports.USE_BRAND = 'stanford';
Both are not in the existing config. The other variables (module.exports.ABOUT_OVERRIDE, module.exports.EXTRA_ABOUT_PAGES, module.exports.EXTRA_NAVBAR, module.exports.DISCOURSE_SSO_REDIRECT) were the ones that were empty in the existing config.
Edit:
Also, the almond-cloud github README seems to show that the installation method has changed? Its different from the one in the installing a custom Cloud Almond docs. Which one should we follow?
Config files are layered: multiple config files are merged and redefine variables. The base config file is still the same: https://github.com/stanford-oval/almond-cloud/blob/master/src/config.ts
As for the readme, yes we have a new installation method if you want to use kubernetes. It is mostly oriented towards development of almond-cloud itself, but should work more generally if you know how kubernetes works. The existing manual method still works though, and given that you had a working configuration I suggest you use the previous method.